Stellex mini-Yig control board

Mega 8 controlboard

Finally got around to make a PCB to control the Stellex synthesizers. I got a bit frustrated trying to use KiCAD, placing aribtrary vias is something KiCAD could improve as well as arcs in copper layers. I was going to use eagle, but found http://easyeda.com that worked fine, at least for something this simple.

I am not very found of ”cloud” solutions, but being able to do routing wherever you are is appealing…

The boards are not anything special, just a AVR mega 8 and two voltage regulators. I included points to connect to most unused pins, perhaps I will use this for some more generic tasks as well.

Hopefully I will get the boards today, they are on the way from dirtypcbs with DHL. Shipping is more expensive than the pcbs, but I didn’t want to wait for the HK post shipping…

This is just to get started, future plans include stabilization of the internal 10Mhz reference oscillator with GPS and/or an OCXO.
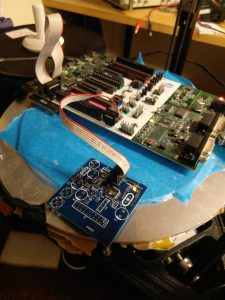
Stellex mini YIG success!


Finally! After tracking down the final bug I got the Stellex Endwave synthesizer to phaselock.

Next step is to maybe build a bit more standalone solution, currently an ATMEGA8 residing on my STK500 controls the LMX2336 on the synthesizer. I have written a real nice piece of code to control the LMX23*6 family of PLL’s before, but I couldn’t find the source so I borrowed John Miles, KE5FX, code and modified it a bit.

Without his site I would never have been able to get it up and running!

Pictures will follow then I get some more work done.

End goal is a LO for my 10GHz transverter (and perhaps for 24G in the not too distant future…)

Before that I will replace the on-board TCXO with external OCXO.

/SA7AEN

2M antenn 4 element

Jag behöver en antenn som är relativt liten och portabel, maxlängd ca 1 meter. Valet föll på en konstruktion från DK7ZB. Den är inte den mest optimala med tanke på gain, men den är bredbandig och bör fungera bra för både SSB och FM. Dessutom så bör den vara ganska förlåtande vid konstruktionen, matchningen blir också lätt.

Statusen är att bommen är borrad, inga element är kapade. Planen var från början att svarva och fräsa fästen av polyamid, men under tiden har jag skaffat en 3D-skrivare så tanken nu printa fästen i nylon och få en ursäkt att lära mig Freecad.